

How To Chane Fuel Filter On 1995 Escort
The fuel filler neck on rider vehicles is a solid slice of formed tubular steel that joins the fuel filler inlet and the safety fuel fill hose on the gas tank. The fuel filler neck is connected to the torso inlet cutaway with steel screws and is fitted inside a safety hose fastened to the vehicle'southward fuel tank.
There is a steel hose clamp around the rubber hose to seal the fuel filler cervix to prevent any fuel leakage. Inside the fuel filler cervix, there is a one style valve that prevents any object from entering the fuel tank, like a syphon hose. Over time, the fuel filler cervix rusts, creating leaks. Plus, the rubber hose becomes weather-croaky, causing a fuel leak.
Fuel necks on older vehicles may take a short neck and a metal tube in the fuel tank. These types of fuel necks are joined with a long rubber hose with 2 clamps.You can buy replacement fuel filler necks from auto parts stores and from the dealership.
Fuel leakage in a vehicle tin can be very dangerous. Liquid fuel does not fire, nonetheless, the vapors given off the fuel is farthermost combustible. If there is a leak at the fuel filler neck, in that location is a risk of the fuel vapors igniting when rocks are thrown up into the cycle well or under the vehicle causing a spark.
-
Note: It is recommended that y'all purchase a fuel filler neck from the dealership since information technology is an original manufactured equipment, or OEM. Fuel filler necks that are aftermarket may not fit into your vehicle and also may non mount correctly.
-
Alert: Do not smoke around a vehicle if yous smell fuel. You are smelling the vapors which are very flammable.
Part one of 5: Verifying the fuel filler neck condition
Step i: Locate the fuel filler neck. Visually wait at the fuel filler neck for any exterior damage.
Check to see if all of the mounting screws are within the fuel door area. Verify that the rubber hose and clamp are visible and if in that location is any harm.
- Note: On some vehicles, you may not be able to check the condom hose and clamp under the vehicle. There may be a embrace that protects the fuel hose from debris, which needs to come up off for inspection.
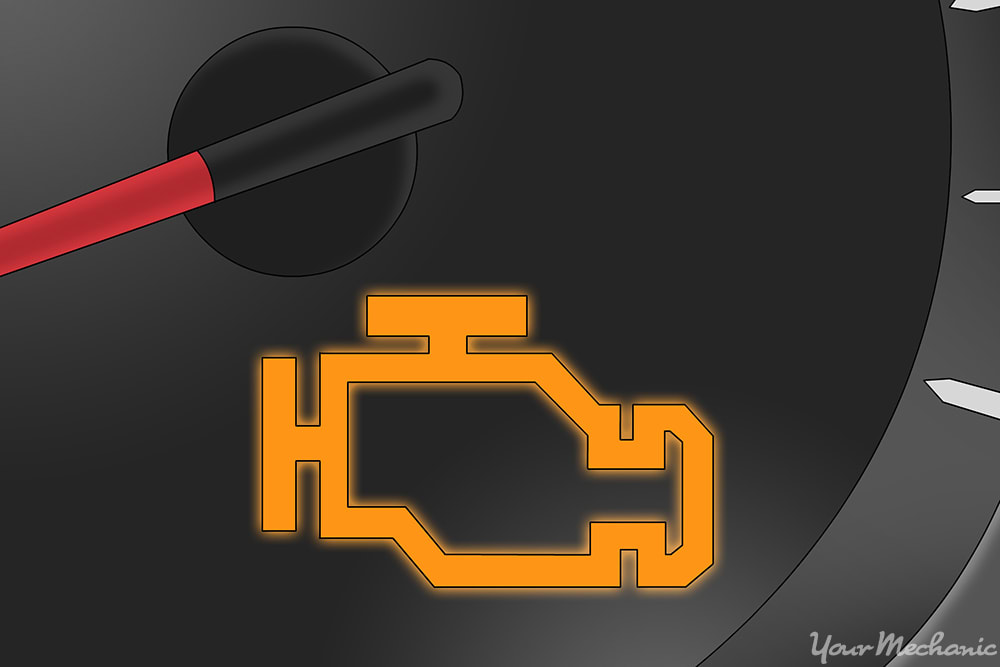
Step 2: Determine if the fuel filler cervix is leaking vapors. If the fuel filler neck leaks vapors out, the engine direction arrangement records this.
Sensors sniff for vapors and make the engine lite come on when vapors are present. Some common engine light codes related to fuel vapors near the fuel filler neck are as follows:
P0093, P0094, P0442, P0455
Office two of five: Replacing the fuel filler neck
Materials Needed
- Allen wrench set up
- Boxed end wrenches
- Breaker bar
- Combustible gas detector
- Drip pan
- Flash light
- Flathead screwdriver
- Floor jack
- Fuel resistant gloves
- Fuel transfer tank with pump
- Jack stands
- Needle nose plyers
- Protective habiliment
- Ratchet with metric and standard sockets
- Torque wrench
- Torque scrap ready
- Transmission jack
- Safety spectacles
- Wheel chocks
Pace ane: Park your vehicle on a flat, hard surface. Make certain that the transmission is in park (for automatics) or in 1st gear (for manuals).
Step ii: Place cycle chocks around the tires. In this case, the wheel chocks will be around the forepart tires since the rear of the vehicle will be lifted upward.
Engage the parking brake to the lock the rear tires from moving.
Footstep 3: Install a nine volt battery saver into your cigarette lighter. This will keep your estimator alive and go on your setting current in the vehicle.
If you do not accept a nine volt battery saver, that is okay.
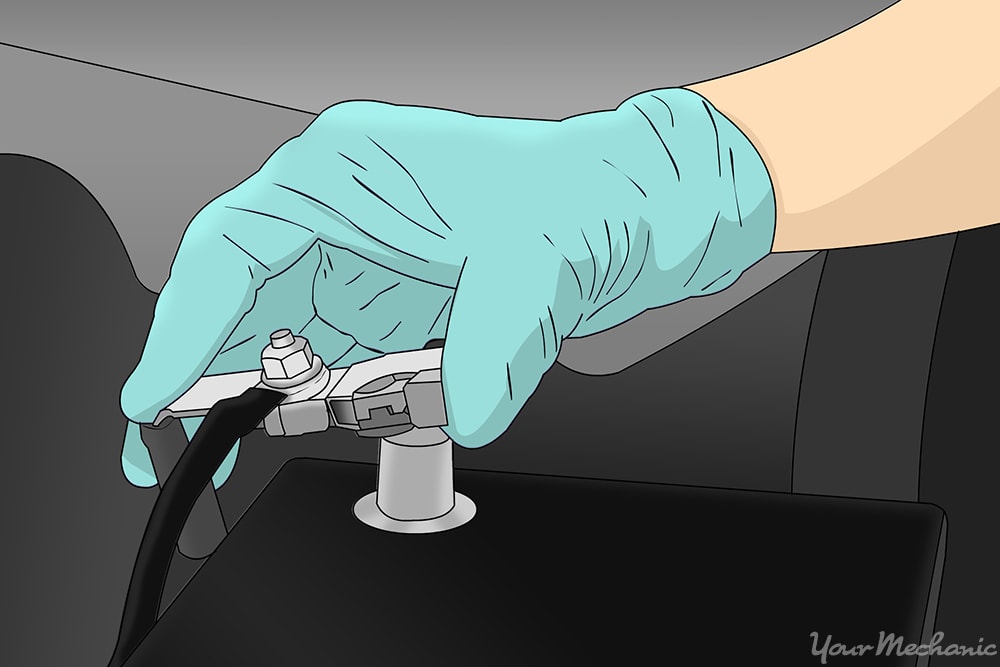
Pace 4: Open the vehicle's hood to disconnect your battery. Have the basis cable off of the bombardment'south negative post disabling the power to the fuel pump or sending unit.
Step 5: Raise the vehicle. Using a flooring jack, lift under the vehicle at its specified jacking points until the wheels are completely off the basis.
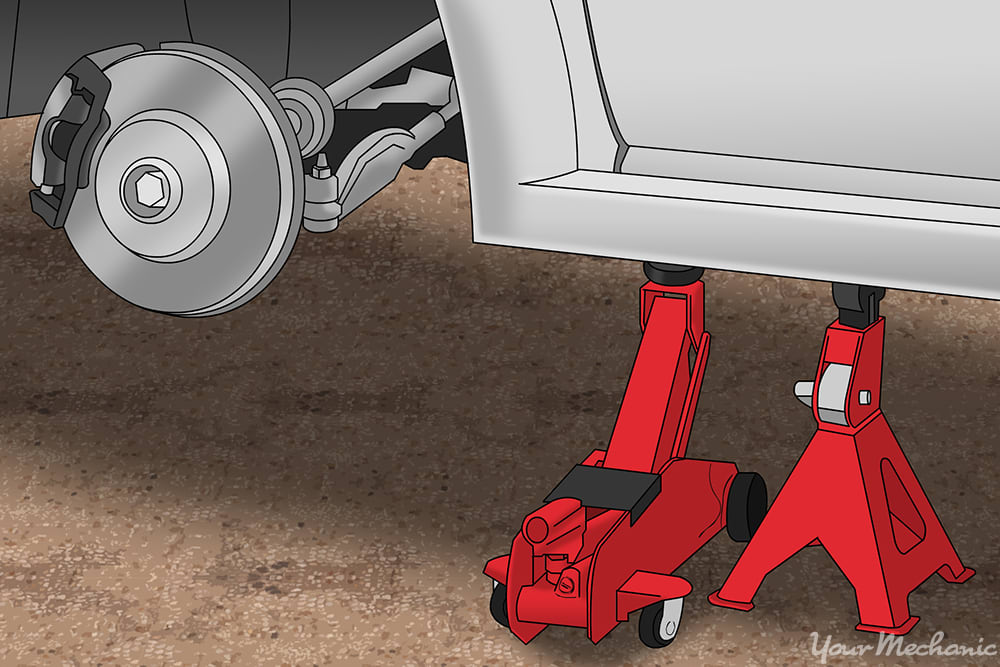
Pace 6: Place the jack stands. The jack stands should become under the jacking point locations; lower the vehicle onto the jack stands.
For about modern cars, the jacking points for jack stands will be on the pinch weld just nether the doors along the bottom of the automobile.
- Note: Best to follow the vehicles owners manual for proper jacking locations.
Step 7: Open up the fuel door to proceeds admission to the fuel filler cervix. Remove the mounting screws or bolts attached to the cutaway.
Footstep 8: Remove the fuel filler cap cable from the fuel neck and place bated.
Stride 9: Locate the fuel tank. Become under the vehicle and locate the fuel tank.
Step x: Lower the fuel tank. Take a manual jack or similar jack and place information technology under the fuel tank.
Loosen and remove the straps to the fuel tank and lower the fuel tank a little.
Stride 11: Disconnect the harness from the connector. Reach upwardly on peak of the fuel tank and feel for a harness attached to the tank.
This is the harness for the fuel pump or sending unit of measurement on older vehicles.
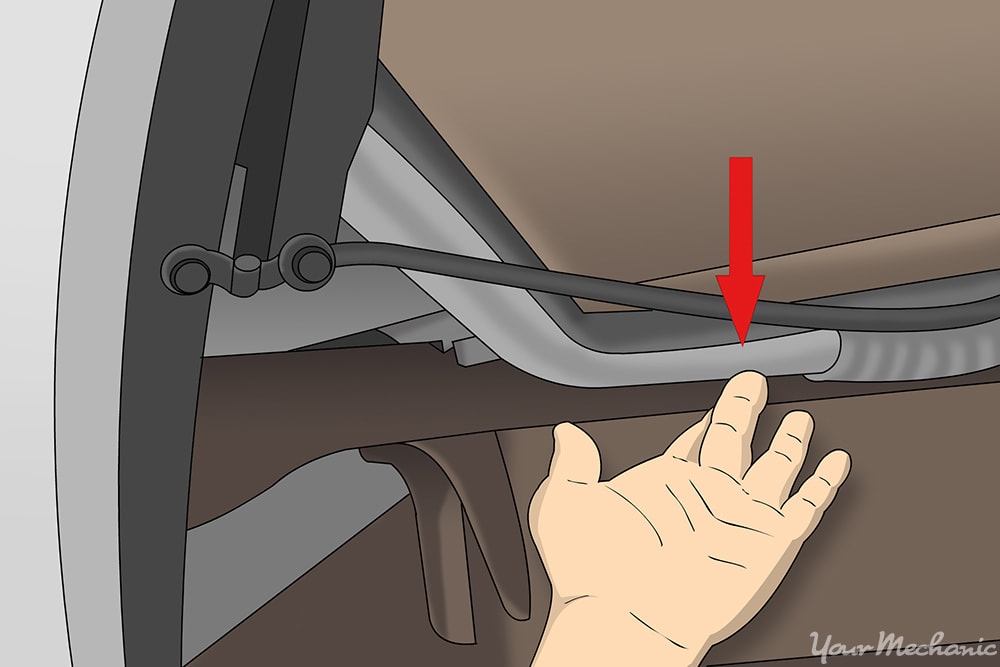
Pace 12: Lower the fuel tank more to reach the vent hose attached to the fuel tank. Remove the clench and minor vent hose to permit more clearance.
- Note: Vehicles from 1996 and newer have a return fuel charcoal canister attached to the vent hose to collect fuel vapors for emissions.
Footstep thirteen: Remove the fuel filler neck. Remove the clamp on the condom hose attaching the fuel filler neck and twist the fuel filler neck, pulling it out of the safety hose.
Guide the fuel filler neck out of the area and remove it from the vehicle.
- Annotation: If you accept to remove the fuel tank for clearance, be sure to transfer any fuel out of the tank prior to transferring the fuel tank. It is best to have the vehicle at a ane/iv tank of fuel or less when removing the fuel filler neck.
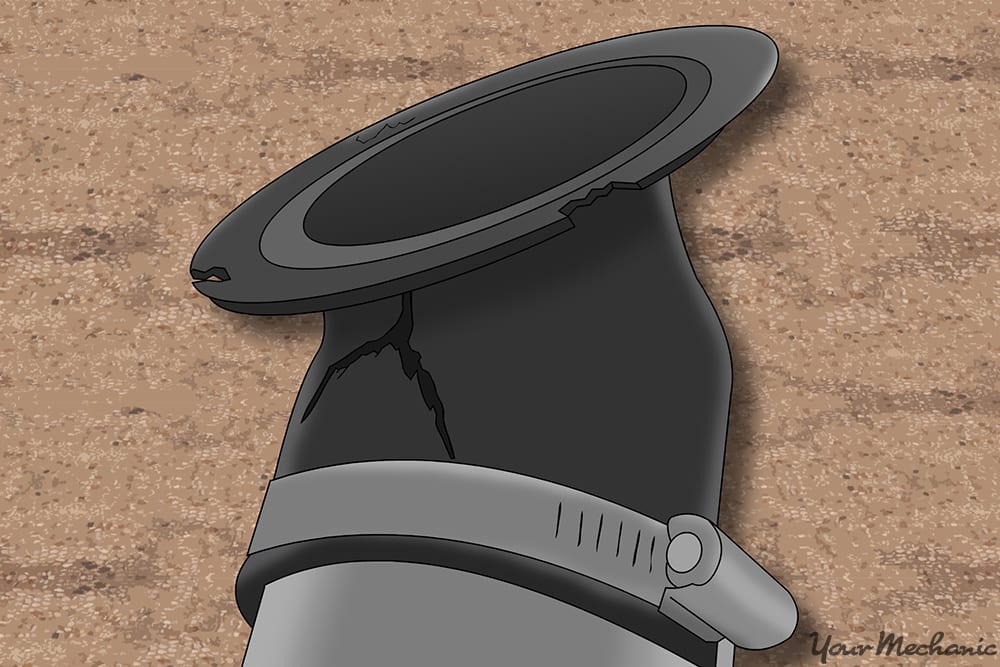
Step 14: Inspect the rubber hose for any cracks. If there are whatever cracks, the rubber hose must be replaced.
Step xv: Make clean the harness and the connector to the fuel pump or sending unit on the fuel tank. Use electrical cleaner and a lint free cloth to remove any wet and debris.
While the fuel tank is lowered, it is recommended to remove and replace the one way sabbatical valve on the tank. If the sabbatical valve on the fuel tank is non serviceable, so y'all will demand to use a pump to cheque the valves status. If the valve has failed, you will need to replace the fuel tank.
The sabbatical valve on the fuel tank allows fuel vapors to release into the canister simply not allow any water or droppings into the tank.
- Note: When replacing a fuel filler neck on a truck, remove the spare tire to gain access to the neck. On some trucks you can replace the fuel filler neck without dropping the fuel tank.
Step 16: Wipe out the condom hose on the fuel tank with a lint free cloth. Place a new clamp onto the rubber hose.
Take the new fuel filler neck and twist it into the safety hose. Put the clench in place and tighten upward the slack. Allow the fuel filler neck to twist but not permit the clamp to move.
Step 17: Raise up the fuel tank to the vent hose. Attach the vent hose using a new clamp.
Tighten the clamp until the hose will not twist and plow ane/viii turn.
- Warning: Brand sure that you do not use the onetime clamps. They will not hold tight and cause a vapor leak.
Pace xviii: Raise up the fuel tank. Exercise this all the style upwardly to marshal the fuel filler cervix to the cutaway and align the fuel filler cervix mounting holes.
Footstep nineteen: Lower the fuel tank and tighten the clench. Continue the fuel filler cervix from moving.
Footstep 20: Enhance upward the fuel tank to the harness. Connect the fuel pump or sending unit harness to the fuel tank connector.
Step 21: Attach the fuel tank straps and tighten them up till they stop. Torque the mounting nuts to specifications on the fuel tank.
If yous do non know the torque value, you lot tin can tighten the nuts one/eight turn more with bluish locktite.
Step 22: Align up the fuel filler neck to the cutaway in the fuel door area. Install the mounting screws or bolts into the cervix and secure it tight.
Adhere the cable of the fuel filler cap to the cervix and screw on the fuel filler cap until it locks in identify.
Part three of five: Bank check for leaks
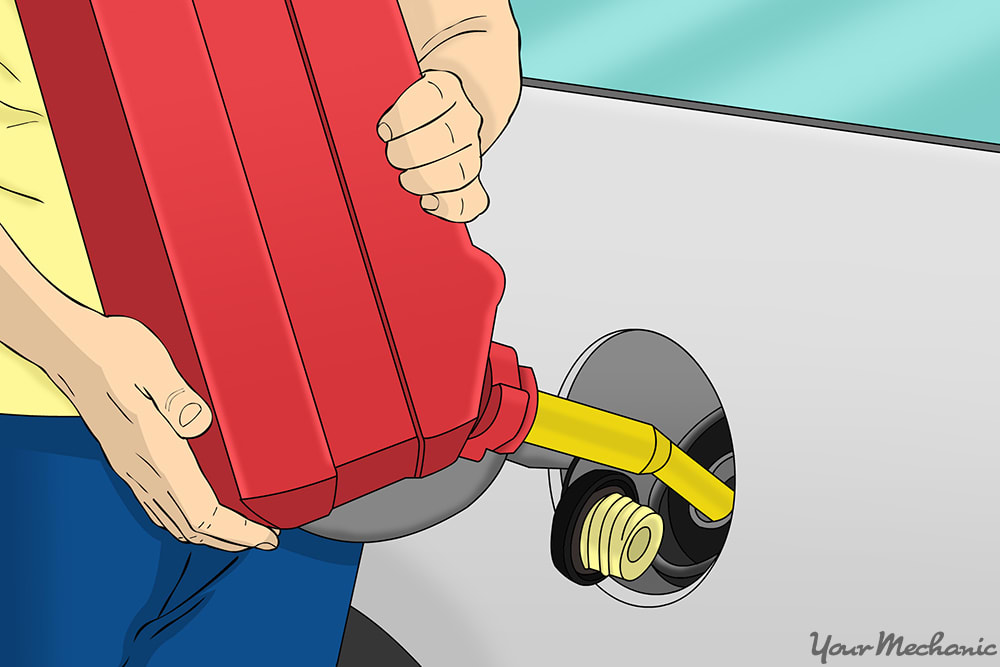
Step 1: Get the transfer tank or a portable fuel tin can. Remove the fuel filler cap and empty the fuel into the fuel filler neck fueling upward the tank.
Try not to drain any fuel on the ground or neck area.
Step 2: Check for leaks. Look 15 minutes abroad from the vehicle and, later 15 minutes, come up dorsum to the vehicle and check for leaks.
Await nether the vehicle for any fuel drops and sniff around to come across if you smell any vapors. You can use a combustible gas detector to check for whatever vapor leaks that you cannot smell.
If there are no leaks, you can proceed. However, if you observe a leak, check the connections to see if they are tight. If you had to make adjustments, make sure to check for leaks again earlier continuing.
- Note: If there are whatever vapor leaks, when driving the vehicle the vapor sensor will pick upwardly the leak and display the engine lite.
Role 4 of v: Render vehicle to operating condition
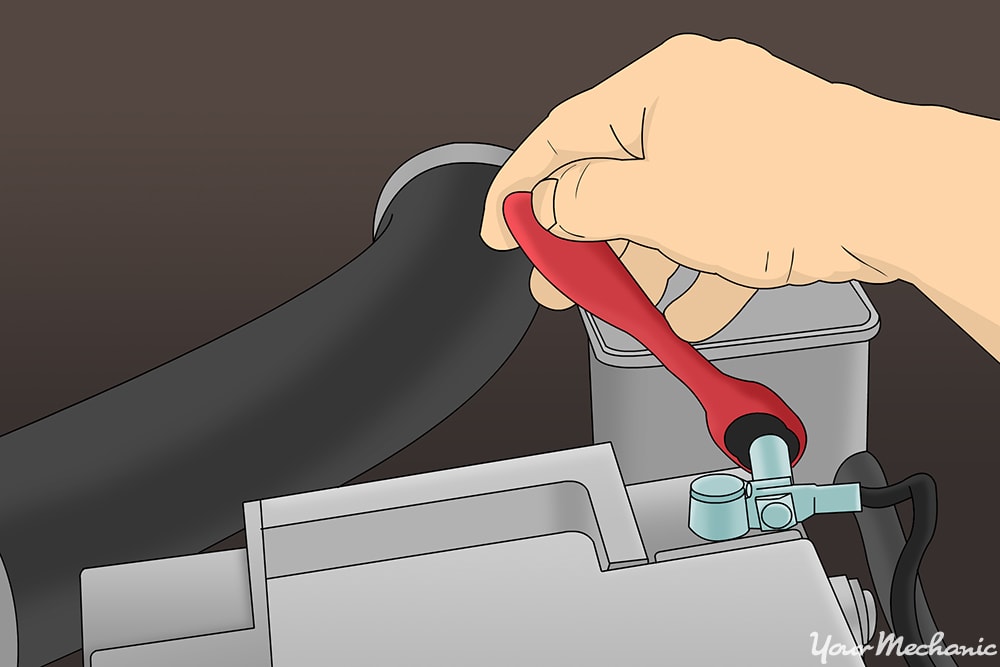
Footstep 1: Open up the vehicle's hood. Reconnect the ground cable back onto the battery'southward negative post.
Remove the nine volt battery saver from the cigarette lighter if needed.
Step 2: Tighten the battery clamp. Ensure that the connection is good.
- Note: If you did not take a nine volt battery saver, you will have to reset all of the settings in your vehicle, like your radio, electrical seats, and electric mirrors.
Step iii: Raise the vehicle. Using a flooring jack that is recommended for the weight of the vehicle, lift under the vehicle at its specified jacking points until the wheels are completely off the ground.
Step 4: Remove the jack stands and keep them far away from the vehicle.
Step 5: Lower the vehicle to where all four wheels are on the footing. Pull out the jack and put it aside.
Pace 6: Remove the wheel chocks from the rear wheels and put the aside.
Part 5 of 5: Test bulldoze the vehicle
Step 1: Bulldoze the vehicle effectually the cake. During the test, get over different bumps allowing the fuel to slosh around within the fuel tank.
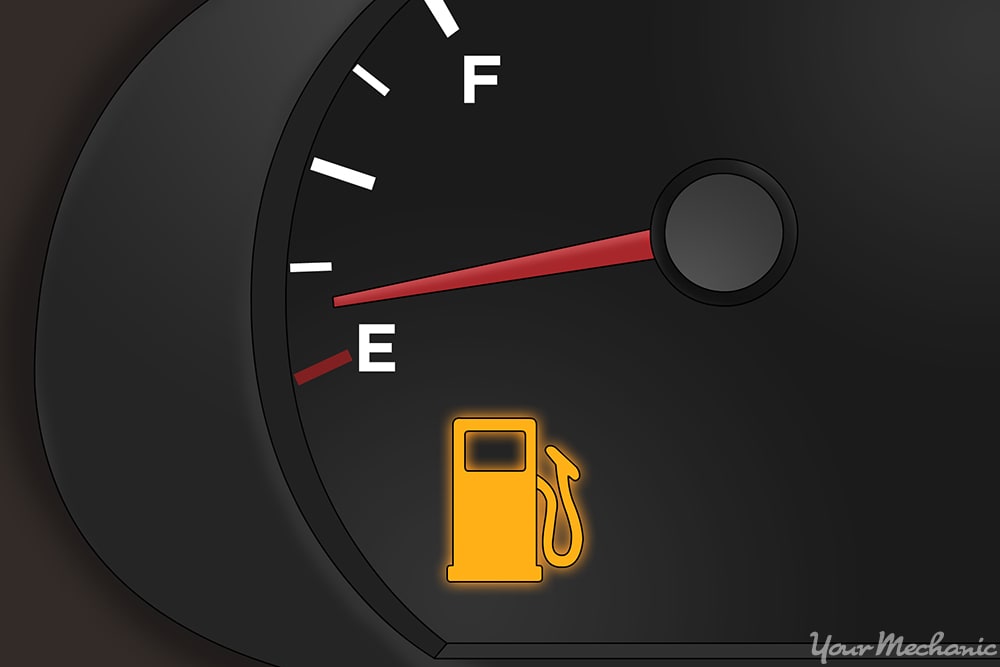
Step 2: Monitor the dash for the fuel level and for any engine calorie-free to appear.
If your engine low-cal comes on after replacing the fuel filler cervix, then at that place may be further diagnosis of the fuel organisation needed or a possible electrical issue inside the fuel system. If the trouble persists, then you should seek out assist from one of YourMechanic's certified mechanics that can inspect the fuel filler neck and diagnosis the problem.
The statements expressed above are simply for informational purposes and should exist independently verified. Please run across our terms of service for more than details

How To Chane Fuel Filter On 1995 Escort,
Source: https://www.yourmechanic.com/article/how-to-replace-a-fuel-filler-neck-by-marvin-sunderland
Posted by: ortizfirembles.blogspot.com
0 Response to "How To Chane Fuel Filter On 1995 Escort"
Post a Comment